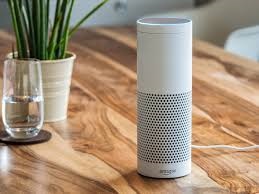
Unboxing the Echo Studio is an experience that signals the start of high-fidelity smart audio in your home. As you open the sleek, minimalist packaging, the Echo Studio itself is the first thing to catch your eye — a cylindrical, fabric-covered speaker that feels solid and premium. The charcoal-colored mesh exterior gives it a modern yet understated appearance, designed to blend in with most home décor. The device is slightly larger and heavier than typical Echo speakers, a reflection of the power it houses within its five internal speakers, including a powerful woofer for rich bass.
Beneath the top layer of packaging, you’ll find the essentials: the power adapter, which is slightly larger than that of standard Echo devices due to the Studio’s higher power requirements, and a quick start guide. There are no unnecessary accessories, staying true to Alexa’s minimalist approach. The setup instructions are simple and concise, guiding you to use the Alexa app to complete the configuration.
As you remove the protective plastic and hold the Echo Studio, you’ll notice its weight and sturdy build, suggesting durability and high-quality components. On the top, the familiar array of control buttons — volume up/down, microphone off, and action button — are present, surrounding the LED light ring which provides visual feedback during setup and usage. Ports for power and optional 3.5mm/optical input are located subtly on the rear.
Everything about the unboxing process reflects Alexa’s intent: a premium smart speaker that’s easy to set up, yet delivers an immersive audio experience. It’s clear that the Echo Studio isn’t just another smart speaker — it’s designed for those who care about sound quality, voice control, and seamless integration with the Alexa ecosystem. Unboxing it sets the stage for a rich and engaging audio journey.
Plug in the Echo Studio
After unboxing your Echo Studio, the next step is to power it up — a straightforward yet exciting part of the setup process. Begin by taking the included power adapter and connecting it to the port located discreetly at the back of the speaker. The adapter has a custom design specific to Echo Studio, ensuring a snug and reliable connection. Once securely plugged in, insert the other end into a nearby power outlet. Immediately, you’ll notice the LED light ring at the top of the Echo Studio begin to glow. First, it will display a solid blue color as the device boots up, followed by an orange rotating light, which indicates that the Echo Studio is entering setup mode and is ready to be configured using the Alexa app.
This lighting pattern is your visual cue that the speaker is operational and actively waiting to connect. If the light ring doesn’t turn orange, you can press and hold the Action button on top of the device for about 6 seconds to manually enter setup mode. It’s a good idea to place the Echo Studio in a central, open location in your room—ideally on a flat surface like a table or shelf—away from obstructions such as walls or curtains. This not only helps with microphone accuracy for voice commands but also optimizes the Studio’s advanced audio projection technology, including 3D spatial audio and Dolby Atmos support.
At this point, the Echo Studio is drawing power and fully energized, ready to begin its transformation into the intelligent centerpiece of your home’s audio and smart system. With its powerful internal components now active, you’re just a few steps away from experiencing immersive sound and hands-free Alexa functionality. Plugging in the Echo Studio is the gateway to unlocking a smart, high-fidelity listening environment.
Download the Alexa App
To get your Echo Studio up and running, downloading the Alexa app is an essential step. The Alexa app acts as the command center for all your Echo devices, allowing you to complete the setup process, manage settings, and personalize your smart speaker experience. Begin by opening the App Store on your iPhone or the Google Play Store on your Android device. In the search bar, type “ Alexa” and look for the official app published by Mobile LLC. It’s easily identifiable by its blue icon featuring a white speech bubble outline. Once found, tap “Download” or “Install” and wait for the app to finish installing on your device. Depending on your internet speed and phone model, this usually takes less than a minute.
Once installed, open the app. The first screen will prompt you to sign in using your account credentials. If you already have an account (the same one used for shopping or Prime), enter your email and password. If not, the app allows you to create a new account quickly by entering some basic information. After signing in, the app may ask for permission to access Bluetooth, Wi-Fi, notifications, and your location—granting these helps Alexa provide more accurate information and smoother setup.
The Alexa app is more than just a setup tool; it’s where you’ll adjust device settings, link music services like Spotify or Apple Music, add smart home devices, and create routines that automate daily tasks. It also features a “Devices” tab where you can control multiple Echo speakers, smart lights, plugs, thermostats, and more. Downloading the Alexa app is a simple yet vital step in turning your Echo Studio into a powerful, voice-activated assistant and high-quality audio hub.
Sign in to Alexa Account
Once the Alexa app is downloaded and installed on your smartphone or tablet, the next step is to sign in to your Alexa account. This is a crucial part of the Echo Studio setup process, as it links your device to Alexa’s cloud services, enabling personalized features, smart home control, music streaming, and more. Open the Alexa app, and you’ll be prompted with a welcome screen asking you to sign in. Tap the “Sign In” button and enter the email address and password associated with your Alexa account. If you’re already signed in to other Alexa services on your device, the app might auto-detect and pre-fill your credentials, making the process even faster.
If you don’t already have an Alexa account, there’s an option to create one directly from the app. Just tap “Create a New Alexa Account” and follow the on-screen instructions to enter your name, email address, and a secure password. After signing in, Alexa may ask you to complete two-step verification, especially if you have it enabled for security. This usually involves receiving a code via text or email, which you’ll need to enter in the app.
Once you’re successfully logged in, the Alexa app will begin personalizing your experience. It may ask for a few more details such as your name and phone number to help with voice recognition and communication features like Alexa Calling and Messaging. You’ll then be guided through setting up your Echo Studio, connecting it to Wi-Fi, and linking services such as music apps and calendars. Signing in also syncs your preferences and smart devices if you’ve used Alexa before. Overall, this step securely connects your Echo Studio to Alexa’s ecosystem, unlocking the full potential of voice control, automation, and intelligent features tailored just for you.
Add a New Device
After signing in to the Alexa app, the next important step is to add your Echo Studio as a new device so that it can be recognized, configured, and controlled within the Alexa ecosystem. This process is simple and guided entirely through the app. Start by opening the Alexa app and tapping on the “Devices” tab located at the bottom right corner of the home screen. From there, tap the “+” (plus) icon in the top-right corner or select “Add Device” from the menu. You’ll be presented with a list of device types — choose “Alexa Echo” and then select “Echo Studio” from the options.
The app will begin searching for nearby Echo devices that are in setup mode. Your Echo Studio should already be in setup mode if the light ring on top is spinning orange. If not, simply press and hold the Action button on the top of the speaker for about six seconds until the orange light appears. This signals that the device is ready to be discovered by the app.
Once the Echo Studio is detected, tap on its name in the app to begin the pairing process. The app may prompt you to confirm your Wi-Fi network and enter its password so that the Echo Studio can connect to the internet. After successfully connecting to Wi-Fi, your Echo Studio will complete its initial configuration, which may include checking for and installing software updates.
At this point, the app will ask you to assign a room or group to your Echo Studio, such as “Living Room” or “Bedroom,” which helps with managing multiple smart devices and using group commands. By adding your Echo Studio to the Alexa app, you unlock its smart capabilities, including music playback, voice control, and integration with other Alexa-compatible devices in your home.
Connect to Wi-Fi
Connecting your Echo Studio to Wi-Fi is a vital step that allows it to access Alexa’s full range of features, including music streaming, smart home control, weather updates, and much more. Once you’ve started the device setup in the Alexa app and selected Echo Studio as the device to configure, the app will automatically guide you through the Wi-Fi connection process. If your Echo Studio is in setup mode (indicated by an orange spinning light ring), it will be discoverable by the app. If it’s not in setup mode, press and hold the Action button (the dot button on top of the speaker) for about 6 seconds until the light turns orange.
When the app detects your Echo Studio, it will prompt you to choose a Wi-Fi network from a list of available connections. Select your home Wi-Fi network and enter the correct password. For best results, make sure you’re connecting to a 2.4 GHz or 5 GHz network with a strong signal, especially if you’re setting the Echo Studio up in a large room or further from the router. The app will attempt to connect the device, which may take a minute or two.
Once connected, Alexa will let you know by saying something like, “Your Echo is ready.” The app may also prompt you to continue with other customization steps, such as setting your time zone or location. Connecting your Echo Studio to Wi-Fi is what brings it to life — allowing it to stream high-resolution music, update its software, control other smart devices, and respond to your voice commands. Without a Wi-Fi connection, Alexa cannot function, so ensuring a strong and stable connection is key to a seamless experience with your Echo Studio.
Complete Setup
Once your Echo Studio is connected to Wi-Fi, you’re nearly ready to start using it—but there are a few final steps to complete the setup and personalize your experience. After confirming a successful Wi-Fi connection, the Alexa app may check for any available software or firmware updates. If an update is required, it will automatically download and install. This process may take a few minutes, during which the Echo Studio’s light ring may pulse or change colors. It’s best to let the device sit undisturbed until it announces that the update is complete or the light returns to normal.
Next, the app may prompt you to select a room name or create a group, such as “Living Room” or “Bedroom.” Assigning your Echo Studio to a specific location in your home helps you organize multiple Alexa devices, use voice commands like “Play music in the living room,” and create automation routines involving smart lights, plugs, or thermostats in that room.
At this stage, you’ll also be given the option to set up voice profiles, which allow Alexa to recognize different people in your household and offer personalized responses for things like calendars, music preferences, and reminders. You can also link services such as Spotify, Apple Music, Alexa Music, or other media platforms to start streaming right away. For a more tailored experience, you may want to enable Skills—voice-powered apps that let Alexa do everything from ordering food to providing guided workouts.
Once these preferences are set, Alexa will confirm that your Echo Studio is ready. You can now say “Alexa” followed by a command like “What’s the weather?” or “Play some jazz music.” Completing the setup ensures your Echo Studio is fully integrated, personalized, and ready to deliver both immersive audio and smart assistant features right out of the box.
Enable Voice Recognition
Enabling voice recognition on your Echo Studio is an important step to personalize the Alexa experience for each member of your household. With this feature activated, Alexa can distinguish between different voices and provide tailored responses based on who is speaking. This means if you ask Alexa to “play my music,” it will play songs from your personal playlists, and if someone else makes the same request, Alexa will access their preferences instead. To enable voice recognition, open the Alexa app and go to Settings > Your Profile & Family > Your Voice (or simply search “Voice ID” in the app). From there, you’ll be guided through a simple process to create your Voice ID.
The app will ask you to speak a few sample phrases aloud in a quiet environment. Alexa uses these voice samples to learn the unique characteristics of your voice. The process usually takes only a minute or two and greatly enhances Alexa’s ability to respond intelligently and accurately to individual users. If you live in a multi-person household, each person can create their own profile and Voice ID by logging into their own Alexa account within the Alexa app and repeating the same setup process.
Once voice recognition is enabled, Alexa can tailor its responses to things like calendar events, reminders, shopping lists, and music preferences. It can even distinguish voices for features like Alexa Calling and Messaging, ensuring messages go to the right contact. Additionally, enabling Voice Match adds a layer of privacy, as Alexa won’t share certain personal information unless it recognizes the speaker.
By enabling voice recognition, you transform your Echo Studio from a shared smart speaker into a truly personalized assistant for every individual in your home, making interactions more intuitive, accurate, and secure.
Customize Settings
After your Echo Studio is set up and connected, the next step is to customize its settings to tailor the device to your preferences and lifestyle. The Alexa app offers a comprehensive range of options to fine-tune your Echo Studio’s behavior and optimize your experience. You can start by selecting your default music service under the app’s Music & Podcasts settings, allowing Alexa to stream your favorite songs from platforms like Spotify, Alexa
Music, Apple Music, or Pandora without you having to specify the source every time. This makes voice commands like “Alexa, play my workout playlist” seamless and effortless.
You can also customize the smart home device integrations, which is especially useful if you have connected lights, thermostats, security cameras, or plugs. In the Alexa app, navigate to the Devices section to add or organize these smart devices, assign them to rooms, and create groups. This setup allows you to use voice commands such as “Alexa, turn off the living room lights” or “Set the thermostat to 72 degrees,” simplifying home automation.
Additionally, you can adjust the notification preferences to control which alerts Alexa will notify you about, such as shopping reminders, package deliveries, or smart home events. In Settings, you can also configure Do Not Disturb schedules to silence Alexa’s responses during certain hours, like nighttime.
Other customization options include setting your location and time zone, which helps Alexa provide accurate weather forecasts, traffic updates, and local news. You can enable brief mode if you prefer shorter Alexa responses or adjust the wake word if you want to use alternatives like “Echo,” “Alexa
,” or “Computer.”
Fine-tuning these settings ensures your Echo Studio functions in harmony with your daily routine and preferences, creating a more intuitive and enjoyable smart assistant experience that’s uniquely yours. Customization is key to unlocking the full potential of your Echo Studio, making it not just a speaker but a versatile, personalized hub for your smart home.
Test Alexa
Once your Echo Studio is fully set up and customized, it’s a great idea to test Alexa to ensure everything is working smoothly and to familiarize yourself with how the voice assistant responds. Testing Alexa is simple and fun — start by saying the wake word, typically “Alexa”, followed by a command or question. For example, you can say, “Alexa, what’s the weather today?” or “Alexa, play some music.” If Alexa responds accurately and promptly, it confirms that your device is properly connected to Wi-Fi and that your voice is being recognized clearly by the microphones.
To test the audio quality of your Echo Studio, you can say, “Alexa, test my sound,” and Alexa will play a short audio calibration sequence. This helps the Echo Studio automatically adjust its speakers to deliver optimal sound based on your room’s acoustics. You can also try commands like, “Alexa, increase the volume,” or “Alexa, set the volume to 5” to check if the volume controls respond correctly.
If you have smart home devices connected, test those as well by asking Alexa to control them — for example, “Alexa, turn off the living room lights” or “Alexa, lock the front door,” to verify the integration works properly. Additionally, try calling or messaging features by saying, “Alexa, call Mom” or “Alexa, send a message to John,” especially if you set up voice recognition for personalized responses.
If Alexa doesn’t respond as expected, you can troubleshoot by ensuring the Echo Studio is within Wi-Fi range, microphones are enabled (not muted), and your voice commands are clear and distinct. The Alexa app also provides troubleshooting tools and tips to help resolve common issues.
Testing Alexa is an important final step that confirms your Echo Studio is ready to deliver the premium smart speaker experience Alexa
promises — from high-quality sound to responsive voice control and seamless smart home integration. It’s also a chance to get comfortable with your new digital assistant and explore the many ways Alexa can simplify and enhance your daily life.