Step 3: Sign In to Alexa Account
Once you have downloaded and installed the Alexa app on your phone or tablet, the next step is to log into your Alexa account. You will need to link your account to the Alexa platform. You can take advantage of everything Alexa has to offer thanks to this linking, including voice control, music streaming, home automation, and shopping.
The Alexa app will prompt you to sign in or create a new account pretty quickly when you first launch it. You can just enter your phone number, email address, and password if you already have an Alexa account—possibly from all of your shopping adventures. To continue, tap “Sign In” after that.
Simply click the link that says “Create a new Alexa account” if you haven’t already. A strong password, your name, and your email address or mobile number are among the basic information you will need to supply. Use a combination of letters, numbers, and symbols to create a strong password. By doing this, you can prevent account hacking.
You may be asked to verify your identity by sending a one-time password (OTP) to your registered email address or phone number after logging in. Enter the code when prompted to complete the verification process.
The Alexa app may ask you to accept Alexa terms of service and enable certain optional features, like location access, voice purchasing, and notifications, after you log in. These features are simple to turn on or off for the time being, and you can easily change your mind later by going to the app’s settings.
You can enable syncing with services like Audible, Kindle, and Alexa Music by logging in and connecting your Echo device to your Alexa account. It also enables functions like calendar access, shopping lists, reminders, and customized voice recognition. Now, your Echo can access personalized information from your Alexa profile, including your to-do lists, commute times, and preferred news sources. The Alexa app allows you to link and configure your Echo device after you’ve successfully logged in.
Step 4: Tap “Devices” in the App
The next step in configuring your Echo is to go to the “Devices” section of the Alexa app after logging in with your Alexa account. Here’s where you’ll begin configuring your new Echo and connecting it to your home Wi-Fi.
Look at the navigation bar at the bottom of the Alexa app’s main screen. Several icons with the names Home, Communicate, Play, Devices, and More will be visible to you. Tap the “Devices” button, which, depending on your app version, is typically located on the far right or second from the right.
Echo speakers, smart lights, plugs, thermostats, and all the other smart home appliances are all controlled from the Devices tab. When you first log in, a dashboard featuring categories like Lights, Plugs, Cameras, Echo & Alexa, and more will greet you.
A “+” (plus sign) or “Add Device” button can be found in the top right corner of the screen. To begin adding a new device to your Alexa system, just press that button. You will be presented with a menu of device types to choose from.
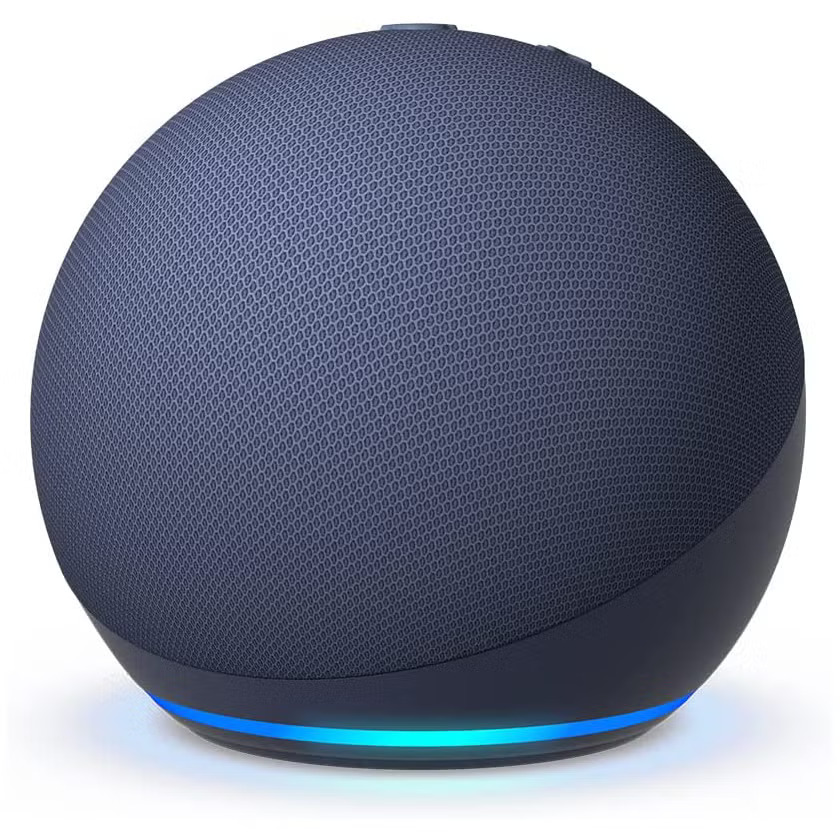
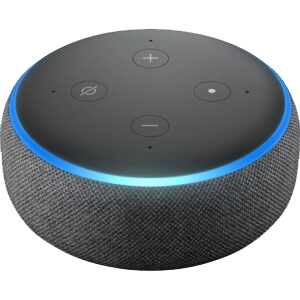
Choose “Alexa Echo” from the list since you’re configuring an Alexa Echo. Select the appropriate option based on your model (e.g., standard Echo, Echo Dot, Echo Show, or Echo Pop). The name is typically printed on the device or packaging if you’re not sure which model you own.
If you’d like to configure your smart home setup, press on the device type to initiate a step-by-step setup procedure that will guide you through naming your device, linking it to Wi-Fi, and selecting a room or group. Also, this is where the Alexa app starts searching for your Echo, which should be in setup mode (indicated by an orange light ring).
You can also use the Devices tab to control, rename, group, and manage your Echo and any other smart devices you may have in the future. It’s not only for setup.
Step 5: Add a New Device
Now that you’ve accessed the Devices tab in the Alexa app, it’s time to add your new Echo device. This step is important because it starts the Echo’s setup and connects your Echo to the Alexa universe.
To begin, click the “\+$” symbol in the upper-right corner of the Devices screen. A list of several options will appear; choose “Add Device.” Device types, such as lights, plugs, cameras, thermostats, and so forth, will be listed. Choose the Alexa Echo from this list since it is the device you are preparing to configure.
A list of different Echo models, including the Echo Dot, Echo, Echo Plus, Echo Studio, and Echo Show, will appear when you select Alexa Echo. Select the model that precisely corresponds to the gadget you are going to configure. Just check the box or compare it to the app’s images if you’re unsure which one you have.
The app will ask you to confirm that your Echo is in setup mode, which is indicated by an orange light ring, after you have chosen the device. Press and hold the Action button, which is a tiny dot on top of most Echo devices, for 6 to 10 seconds until the orange ring appears if your Echo isn’t showing the orange light.
After that, the Alexa app will begin searching for your Echo device via local network connections and Bluetooth. It should only take a few seconds. To begin the setup process, tap your device when it appears on the screen. If it doesn’t appear, make sure your Echo is close by and that your phone’s Bluetooth and location services are enabled.
The second important step in the setup process is asking you to connect your Echo to a Wi-Fi network after the app has successfully identified it. However, you have now formally begun to integrate your Echo with the Alexa app.
You can give the device a name and a room after adding it, which helps with voice commands and grouping devices in your smart home..
Step 6: Put Echo in Setup Mode
Your Alexa Echo needs to be in setup mode before it can be linked to Wi-Fi and set up completely in the Alexa app. The Echo can broadcast a temporary signal in setup mode, which the Alexa app can pick up and use to start the configuration process. When the light ring on your Echo turns orange, you’ll know it’s in setup mode.
After a few seconds, your Echo usually switches to setup mode if you’ve just plugged it in for the first time. When the device turns on, the light ring will briefly turn blue before turning orange to show that the Echo is prepared for setup.
You may need to manually put your Echo into setup mode if the light ring goes off, remains blue, or if your device has already been set up. Locate the Action button on your Echo device to accomplish this. Usually found on the top, immediately adjacent to the microphone and volume buttons, it is a tiny, solid dot. Simply hold down the Action button for six to ten seconds. The Echo will say, “Now in setup mode,” and you’ll notice the light ring turning orange. Observe the directions provided by the Alexa app.
When it comes to Echo Show devices, which have a screen, the setup process is a little different. To enter setup mode, just swipe down from the top of the screen and navigate to Settings > Device Options > Reset to Factory Defaults, or choose Setup Device Again, depending on your version. Follow the prompts on the screen to kick off the setup process again.
Once you see the orange light, head back to the Alexa app. It should automatically detect your Echo device since it’s now broadcasting a signal that can be picked up via Bluetooth or Wi-Fi.
If the device still doesn’t show up in the app, double-check that your phone’s Bluetooth, Wi-Fi, and location services are turned on, and make sure you’re close enough to the Echo device.
Step 7: Connect Echo to Wi-Fi
Once your Echo device has been detected by the Alexa app and is in setup mode, it is crucial to connect it to your Wi-Fi network. By connecting your Echo to the internet, Alexa can play music, respond to inquiries, manage smart home appliances, and much more. Just tap on the name of the device once the Alexa app has identified your Echo, which is usually called “Echo Dot-XYZ.” The app will then send the correct network credentials to your phone by temporarily connecting to the Echo’s internal Wi-Fi signal.
The app will then show you a list of Wi-Fi networks that are available. From the list, pick your home Wi-Fi network. Make sure your phone and Echo are within range of your router, or tap “Rescan” if you can’t see your network.
You will be asked to enter your Wi-Fi password after choosing your network. Make sure you type it precisely, matching the password’s case and spelling. If necessary, you can display the characters by tapping the eye icon.
The app will send the password to your Echo device once you’ve entered it. After that, the Echo will try to connect to your network, which could take a minute or so. The app will notify you that it is attempting to complete this task by displaying a progress bar or spinner.
Your Echo will chime in with something like, “Your Echo is ready,” and you will receive a confirmation in the app once the connection is successful. Depending on your particular device, the light ring will also briefly change color, typically turning off or turning blue.
Spend a minute verifying the password, making sure your router is operating correctly, and making sure your Echo is not too far from your Wi-Fi source if your connection isn’t working. Restart your router and Echo if everything else fails. Your Echo will be fully online and operational as soon as it is linked to Wi-Fi. You can choose a device name and location, among other optional personalization options, using the Alexa app.
Step 8: Wait for Confirmation
The next step is to wait for confirmation from both the Alexa app and your Echo device after it has successfully connected to your Wi-Fi network. In addition to completing the connection process, this step lets you know that your Echo is prepared to start responding to voice commands and operating normally.
You will see a loading or progress screen in the Alexa app once it has sent your Wi-Fi credentials to the Echo. As your Echo attempts to connect to your Alexa account and build a strong internet connection, this process may take anywhere from 30 to 60 seconds.
During this process, your Echo’s light ring will change colors to indicate what it’s doing. If it shows a spinning blue light, that means it’s still processing. Once the light ring turns off or shows a brief cyan glow on blue, the Echo is almost ready. On an Echo Show (a model with a screen), you’ll see a “Getting your device online” message followed by a confirmation screen.
When the connection is established, your Echo will speak aloud:
“Your Echo is ready.”
At the same time, the Alexa app on your phone will show a confirmation page with something like “Setup Complete” or “Your Echo is now online.” It might also offer you the choice to select a language, name the device, or add it to a group or room, depending on whether you bypassed those choices previously.
It is vital not to terminate the app or remove the connection during this time. Allow the setup process to complete fully so that there is no connection failure.
If the app doesn’t indicate confirmation or your Echo doesn’t announce it’s ready after a few minutes, there could be a Wi-Fi problem. Then you can return a step in the app and re-enter your Wi-Fi password, or reset your Echo by pressing and holding the Action button to re-enter setup mode.
After you receive the confirmation, your Echo is completely ready, and you’re ready to start enjoying Alexa’s features for music, news, reminders, and more.
Step 9: Choose Location and Room
The Alexa app will direct you to the next, optional but helpful, step after your Echo device has successfully established a Wi-Fi connection and set up: choosing a location and assigning your Echo to a room or group. This step is especially important if you are controlling smart home features or using multiple Alexa devices.
The app will most likely ask you to assign your Echo to a room or a group after displaying the setup confirmation screen. A list of typical room names, such as “Living Room,” “Bedroom,” “Kitchen,” “Office,” etc., will be presented to you. To place your Echo, simply tap on the room’s name. Aside from the pre-configured options, you can also give your room a different name.
This grouping allows Alexa to comprehend your home layout and enhance how she handles voice commands. For instance, if you instruct Alexa to “turn off the lights” and your Echo and smart lights are in the same room grouping, Alexa will turn off only the lights in that particular room, not the whole house.
Besides rooms, the Alexa app might also ask you to define a device location—your city or address, typically. Setting a location isn’t necessary but allows for features such as precise weather forecasts, traffic information, local news, and location-based reminders.
In order to type in your address, you might be required to input some simple information such as street name, city, postal code, and country. This data remains confidential and is only used to make Alexa’s responses more precisely fit your region.
Don’t worry if you omit this step in the initial setup; you can always go back and change or reassign rooms later in the Alexa app by going to Devices > Echo & Alexa > [Your Device Name] > Device Location or Groups.
It may seem insignificant to group and assign locations, but doing so greatly improves the performance of your Echo and allows it to work seamlessly with other smart home appliances for commands like “Alexa, turn on the kitchen lights.”
Step 10: Start Using Alexa
With your Alexa Echo now properly configured, Wi-Fi connected, and set up by room and location, you’re ready to begin using Alexa! Your Echo is now completely functional at this point, and you can start enjoying the many voice commands and smart features that Alexa has to offer.
The first thing you’ll want to do is test your Echo by saying the wake word—“Alexa”—followed by a simple command. For example:
- “Alexa, what’s the weather today?”
- “Alexa, play some music.”
- “Alexa, set a timer for 10 minutes.”
If everything is working properly, Alexa will respond verbally and/or visually (if you have an Echo Show, for instance), giving you the information you requested.
You can now use Alexa for a variety of tasks, such as:
- Smart Home Control: If you’ve set up any smart home devices (like lights, thermostats, or plugs), you can use Alexa to control them. For example:
- “Alexa, turn off the living room lights.”
- “Alexa, set the thermostat to 72°F.”
- Music and Media: Alexa can stream music from services like Alexa Music, Spotify, or Apple Music. You can ask her to play specific songs, playlists, or genres:
- “Alexa, play relaxing music.”
- “Alexa, play the latest podcast.”
- Reminders, Alarms, and Lists: You can ask Alexa to set reminders, create shopping lists, or make to-do lists:
- “Alexa, remind me to call Mom at 3 PM.”
- “Alexa, add eggs to the shopping list.”
- Information and Fun: Ask Alexa for news updates, weather forecasts, jokes, or trivia:
- “Alexa, tell me a joke.”
- “Alexa, what’s the news today?”
- Skills and Apps: To increase Alexa’s functionality, you can enable different skills (third-party apps) through the Alexa app. You can add abilities to order food, operate a robot vacuum, or even control your preferred fitness app.
To access these, simply say:
- “Alexa, enable the [skill name] skill.”
As you interact with Alexa, you may also want to customize settings like privacy, voice preferences, and connected devices. You can always adjust these through the Alexa app.


